Ever wondered if your leftover coffee grounds could double as a secret ingredient for a magical mushroom farm? Picture this: a world where your daily caffeine fix not only energizes your morning but also kick-starts a mini mushroom revolution in your kitchen. Welcome to the ultimate guide on mushroom growing from coffee grounds, a quirky, eco-friendly, and downright fun approach to cultivating mushrooms and exploring the fascinating process behind mushroom coffee. Get ready to dive into a captivating blend of science, sustainability, and DIY magic that’ll spark your inner urban farmer!
Quick Links to Useful Sections
- What Is Mushroom Growing From Coffee Grounds?
- The Magical Science Behind Coffee Grounds & Mushrooms
- Why Grow Mushrooms With Coffee Grounds?
- The Step-by-Step Process of Growing Mushrooms From Coffee Grounds
- Step 1: Gather Your Materials
- Step 2: Prepare and Sterilize the Coffee Grounds
- Step 3: Inoculate with Mushroom Spawn
- Step 4: Incubation Period
- Step 5: Fruiting and Harvesting
- Essential Tips for Thriving Mushroom Cultivation
- Troubleshooting Common Issues in Mushroom Cultivation
- Issue 1: Mold or Contamination
- Issue 2: Slow or No Mycelium Growth
- Issue 3: No Fruiting
- Issue 4: Overwatering
- Sustainable Practices for Eco-Conscious Mushroom Growers
- Creative Ways to Enjoy Your Coffee Grounds Mushrooms and Mushroom Coffee
- Mushroom Coffee
- Mushroom-Infused Recipes
- Preserve and Share
- Community Stories and Case Studies: Urban Homesteaders Making It Work
- The College Dorm Experiment
- The Urban Rooftop Orchard
- The Family Kitchen Initiative
- Resources and Community Support: Your Next Steps
- Frequently Asked Questions About Mushroom Growing From Coffee Grounds
- Your Journey Into the World of Mushrooms and Coffee Grounds
What Is Mushroom Growing From Coffee Grounds?
Mushroom growing from coffee grounds involves using nutrient-rich, recycled coffee waste as a growth medium for various mushroom species. Think of coffee grounds as nature’s own compost superfood, packed with nitrogen and other essential nutrients that mushrooms love. This innovative approach transforms your daily brewed coffee’s remnants into a thriving fungal garden, paving the way for an eco-friendly, low-cost solution to mushroom cultivation.
Whether you’re a coffee aficionado, an eco-warrior, or a curious urban homesteader, this method of growing mushrooms is not only sustainable but also fun and scientifically fascinating. The process is ideal for those interested in mushroom coffee as well, where mushrooms (like reishi, chaga, or lion’s mane) are grown for their health benefits and then incorporated into your daily ritual coffee.
By harnessing the natural synergy between coffee grounds and mushrooms, you’re stepping into a realm where culinary creativity meets environmental consciousness. Plus, it’s a great conversation starter: “Did you know my morning coffee grounds are now a mushroom farm?”
The Magical Science Behind Coffee Grounds & Mushrooms
Let’s break down the science in a way that’s as fun as a science fair experiment but without the school lab smell. Coffee grounds are rich in organic matter and have a balanced pH level that creates a favorable environment for mycelium, the underground network of mushroom roots, to flourish. When these grounds are properly sterilized and mixed with other natural substrates, they become the perfect launchpad for mushroom spores.
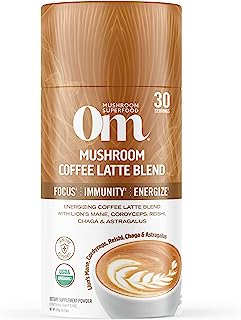
Looking For The Best Mushroom Coffee? You'll Love These:
Mushrooms are part of the fungi kingdom, and unlike plants, they don’t need sunlight to bloom (which is why your indoor-grown oyster mushrooms can thrive in that dim corner of your apartment). Instead, they rely on a moist, nutrient-dense medium to kick off the growth process. Coffee grounds, with their waste-of-life vibe turned eco-chic, offer just that.
Every bit of caffeine and organic residue left behind acts like a tiny power-up for the mushroom’s cellular processes. It’s like feeding your favorite video game character, but instead of earning extra lives, you’re growing a lush, edible fungus garden. And yes, the process is as much about nature’s magic as it is about clever recycling!
Why Grow Mushrooms With Coffee Grounds?
There are plenty of reasons why mushroom growing from coffee grounds is trending among Gen-Z and millennials who are passionate about sustainable living and innovative culinary adventures. Here are some of the standout benefits:
- Eco-Friendly and Sustainable: Reusing coffee grounds reduces waste and gives new life to what would otherwise be landfill material.
- Cost-Effective: Coffee grounds are essentially free if you brew your own coffee regularly, making them an inexpensive growth medium.
- Nutrient-Rich Substrate: The natural chemical composition of coffee grounds provides a balanced diet for mushrooms, stimulating robust mycelium growth.
- Urban Farming Made Easy: Even in a small apartment or city balcony, you can cultivate mushrooms with minimal equipment and space.
- Diverse Culinary Options: From fresh mushrooms to mushroom coffee blends, the culinary potential is vast and creatively inspiring.
- Community and Experimentation: Join a growing community of DIY enthusiasts, urban gardeners, and eco-conscious creatives who are revolutionizing the way we think about waste and food production.
By integrating this quirky method into your lifestyle, you can enjoy fresh, home-grown mushrooms, reduce your environmental footprint, and impress friends with a sustainable success story. Plus, every cup of mushroom coffee you sip later will carry a side of eco-warrior pride!
The Step-by-Step Process of Growing Mushrooms From Coffee Grounds
Ready to roll up your sleeves and get your hands a little… fungal? Here’s your comprehensive, step-by-step guide to turning coffee grounds into a flourishing mushroom habitat.
Step 1: Gather Your Materials
First things first: you need to collect the essentials. Here’s what you’ll be gathering:
- Used Coffee Grounds: Collect fresh, spent coffee grounds from your morning brew (ideally within 24 hours for maximum nutrient value).
- Mushroom Spawn: Choose your favorite mushroom species. Oyster mushrooms are highly recommended for beginners because they’re robust and forgiving.
- Additional Substrates (Optional): Consider adding sawdust, straw, or other organic material to boost nutrient diversity.
- A Container or Growing Bag: A recycled plastic container, bucket, or even a sturdy coffee tin can work as your mini mushroom farm.
- Sterilization Equipment: A pressure cooker or a large pot to sterilize your coffee grounds and substrates.
- Spray Bottle: For keeping the environment moist during the spawning period.
The beauty of this setup is that these are usually items that are easily obtainable and, in many cases, items you already have lying around your home!
Step 2: Prepare and Sterilize the Coffee Grounds
Sterilization is crucial because it eliminates unwanted bacteria and molds that might compete with your mushroom spawn. Here’s how:
- Spread the Coffee Grounds: Evenly dispense your coffee grounds on a clean surface to air out and reduce moisture if needed.
- Sterilize: Depending on your equipment, either use a pressure cooker for 30-45 minutes at 15 psi, or boil the coffee grounds in water for about 30 minutes.
- Cool Down: Allow the sterilized coffee grounds to cool to room temperature before mixing with the spawn.
This process might sound a bit tedious, but it’s what sets you up for a successful mushroom harvest. Think of it as preparing the perfect soil for your garden, just at a microscopic level.
Step 3: Inoculate with Mushroom Spawn
Once your coffee grounds are cool, it’s time to introduce your mushroom spawn, the “seeds” of your fungal future.
Mix the spawn thoroughly with the coffee grounds, ensuring even distribution. You might compare this stage to mixing up the perfect smoothie, where every sip (or in this case, every bit of substrate) is packed with potential.
Step 4: Incubation Period
Transfer your spawn-infused coffee grounds into your container or bag, then seal it loosely to allow for some air exchange. Store it in a dark, warm area (around 70-75°F or 21-24°C is ideal). This incubation period, which can last anywhere from 2 to 4 weeks, is when the mycelium will weave its way through your substrate like a busy network, preparing for the fruiting stage.
During this period, keep your container in a stable environment with minimal direct sunlight; think of it as the cozy, dim room where your mushrooms plan their uprising.
Step 5: Fruiting and Harvesting
After a few weeks of incubation, you should begin to see signs of pinning, the tiny formations that foreshadow mushroom development. Now, it’s time to encourage the fruiting process by:
- Expose to Light: Introduce indirect light to help signal the mushrooms that it’s time to grow up. No need for full-on sun, just a bit of ambient room lighting will do.
- Increase Humidity: Mist the area lightly with a spray bottle to maintain high humidity, reminiscent of a tropical rainforest (at least in spirit).
- Patience Is Key: Watch as those tiny pins transform into full-grown mushrooms over the next few days to a week.
Harvest your mushrooms by gently twisting and pulling them from the substrate when they’re juicy and firm. Enjoy the satisfaction of knowing that your daily coffee habit has turned into a fun and productive gardening adventure!
Essential Tips for Thriving Mushroom Cultivation
As with any exciting DIY project, your new fungal farm might hit some growing pains along the way. Here are some expert tips to ensure that your mushroom growing from coffee grounds reaches full potential:
- Maintain Consistent Moisture: Mushrooms thrive in a humid environment, so keep your substrate moist but not waterlogged. A fine misting every day helps maintain just the right balance.
- Airflow Matters: While mushrooms love humidity, they also need good airflow to prevent mold. Make sure your container isn’t sealed too tightly, small holes or breathable fabric bags work perfectly.
- Monitor Temperature: Consistency in temperature is key. Avoid sudden changes that could stress your mycelium. A stable, warm environment makes for faster and healthier growth.
- Don’t Overcrowd: When transferring to a larger fruiting block, give your mushrooms room to breathe. Crowded conditions can lead to stunted growth and invite unwanted competitors like mold.
- Regular Inspections: Check your setup daily for signs of contamination. Early detection means early intervention, keeping your fungal garden thriving and free from harmful molds.
- Experiment and Learn: Every growing space is unique. Don’t be afraid to tweak your methods, experiment with additional substrates, humidity settings, or light sources to see what works best for your mushroom variety.
With these tips, you’re well on your way to mastering the art of mushroom cultivation. Remember, every setback is just another lesson on your journey to becoming a fungal farming guru!
Troubleshooting Common Issues in Mushroom Cultivation
Even the most passionate DIYers face a few hiccups. Here’s how to troubleshoot the most common issues:
Issue 1: Mold or Contamination
Mold can sometimes sneak into your coffee grounds if sterilization isn’t thorough or if moisture levels are too high. If you spot fuzzy, off-color patches, gently remove the affected area and adjust your hygiene protocols.
Issue 2: Slow or No Mycelium Growth
If your mycelium seems to be taking forever to colonize the substrate, it might be a temperature problem or perhaps the coffee grounds weren’t fresh enough. Make sure your incubation environment stays within the optimal range and always use coffee grounds that were collected recently.
Issue 3: No Fruiting
A common challenge is failing to trigger the fruiting stage. Ensure that your mushrooms are getting enough indirect light and that humidity isn’t dropping. Sometimes, a slight drop in temperature can signal the mushrooms to fruit. Consider these changes as subtle nudges from nature.
Issue 4: Overwatering
While moisture is critical, overwatering can suffocate the mycelium and cause bacterial contamination. Stick to misting instead of drenching, and let your substrate breathe.
By keeping a watchful eye on your mushroom growing from coffee grounds process and making small adjustments along the way, you’ll quickly learn the rhythm of your mini ecosystem. Troubleshooting is part of the fun, turning challenges into opportunities for newfound knowledge and success.
Sustainable Practices for Eco-Conscious Mushroom Growers
Growing mushrooms from coffee grounds isn’t just a hobby, it’s a movement toward reducing waste and promoting sustainability. Here’s how you can make your fungal farm even greener:
- Recycle and Reuse: Use coffee grounds from your own home or local cafes that support waste reduction initiatives.
- Renewable Resources: Combine coffee grounds with other organic waste materials, like spent tea leaves or compost, to create rich, nutrient-dense substrates.
- Eco-Friendly Packaging: If you decide to share your bounty in a community market, opt for biodegradable or reusable packaging.
- Community Sharing: Swap tips, substrates, and even portions of your harvest with fellow eco-enthusiasts. Building a sustainable network magnifies the impact of your small-scale efforts.
- Reduce Your Carbon Footprint: Cultivating your own mushrooms means fewer resources spent on mass production and transportation, making each harvest a small win for the planet.
Embracing these sustainable practices not only benefits your immediate environment but also contributes to a larger, global movement toward eco-conscious living and renewable living.
Creative Ways to Enjoy Your Coffee Grounds Mushrooms and Mushroom Coffee
With a bounty of fresh mushrooms grown from your spent coffee grounds, the culinary possibilities are endless. Along with enjoying classic stir-fries, soups, and sautés, here are some innovative ideas to inspire your inner chef:
Mushroom Coffee
Yes, you read that right, mushroom coffee is a rising trend that infuses your regular coffee with medicinal mushrooms like reishi, lion’s mane, or chaga. These fungi are renowned for boosting brain function, reducing stress, and offering a balanced, earthy taste that pairs surprisingly well with robust coffee flavors. Experiment by brewing a strong cup of coffee with a touch of mushroom extract or even using freshly grown mushrooms in your blend (if you’ve got the know-how)!
Mushroom-Infused Recipes
Don’t stop at drinks, incorporate your mushrooms into creative dishes! Imagine a gourmet risotto where earthy oyster mushrooms elevate a classic recipe, or a spicy stir-fry that turns your DIY harvest into an Instagram-worthy meal. The possibilities are endless: from mushroom tacos to vegan gravy, your culinary adventures are limited only by your imagination.
Preserve and Share
If you find yourself with a surplus of mushrooms, consider drying or freezing them for extended use. Share your bounty with friends or donate to local food banks. Not only does this build community spirit, but it also ensures that the fruits of your sustainable labor reach those who will truly appreciate them.
Integrating your growing experience with unexpected gastronomic creativity not only supports your sustainable lifestyle but also transforms an everyday routine into a celebration of flavor, innovation, and environmental mindfulness.
Community Stories and Case Studies: Urban Homesteaders Making It Work
The best part about mushroom growing from coffee grounds is how it brings together a vibrant, enthusiastic community of eco-hackers, urban gardeners, and mushroom coffee aficionados. Here are a few inspiring stories to motivate your own journey:
The College Dorm Experiment
Meet Alex, a college student with limited space and even fewer dollars to spare. Armed with nothing but a used coffee maker and a passion for sustainability, Alex transformed the dorm room kitchen into a mini-mushroom farm. Within weeks, Alex’s friends were raving about his mushroom coffee lattes and fresh oyster mushrooms, proving that even a cramped dorm can be a haven for eco-friendly innovation.
The Urban Rooftop Orchard
Sarah, an urban professional with a love for both gardening and gourmet food, set up a small mushroom growing station on her rooftop. Using recycled coffee grounds from her favorite local coffee shop, she combined the process with herbs and companion plants. The result? A thriving, self-sustaining ecosystem that not only provided a steady supply of mushrooms but also a stunning green space that became the envy of her neighbors.
The Family Kitchen Initiative
In a bid to reduce household waste and foster responsibility among her kids, Maria decided to turn their everyday coffee waste into an engaging family project. The whole family got involved, from collecting coffee grounds to watching as the mycelium slowly weaved its magic over the course of several weeks. This project not only reduced waste but also became a fun, educational activity that bonded the family over nature’s mysteries.
These success stories serve as a reminder that no matter your space or budget, mushroom growing from coffee grounds is accessible, rewarding, and has the potential to spark meaningful connections within communities.
Resources and Community Support: Your Next Steps
Now that you’re equipped with the knowledge and inspiration to start your own mushroom growing adventure, it’s time to explore additional resources and tap into the supportive network of eco-conscious growers:
- Online Forums and Communities: Join Facebook groups, Reddit communities, or specialized mushroom growing forums where beginners and experts alike share troubleshooting tips, success stories, and innovative methods.
- YouTube Tutorials: Visual learners will benefit from video tutorials on setting up your substrate, inoculation techniques, and harvesting methods. Channels dedicated to urban farming and sustainable living often feature excellent guides.
- Local Workshops and Urban Farming Initiatives: Check out your city’s local gardening centers or community colleges for workshops that delve into sustainable practices. Many urban areas now boast “mushroom clubs” where hands-on experience is shared.
- Books and E-Resources: Dive deeper with literature on mycology, sustainable agriculture, and DIY mushroom cultivation. From beginner guides to detailed scientific texts, there’s plenty to explore.
- Apps and Digital Tools: Utilize mobile apps designed for urban farming that help monitor humidity, temperature, and growth progress. Some apps even allow you to log your harvest and connect with other growers near your area.
- Local Coffee Shops: Believe it or not, some local cafes are excited to partner with sustainable initiatives and may be more than happy to share their used coffee grounds with budding growers.
Surrounding yourself with a vibrant community and reliable resources not only elevates your mushroom growing experience but also transforms it into a continuing journey of discovery. Your next steps may be as simple as reaching out in a forum, signing up for a workshop, or even pitching a sustainable partnership with your local coffee spot. Every little action propels you further on your path to mastering the art of coffee grounds mushroom cultivation, and maybe even inspiring the next wave of mushroom coffee innovations.
Frequently Asked Questions About Mushroom Growing From Coffee Grounds
To help you navigate the fascinating world of mushroom growing from coffee grounds, here are some frequently asked questions that address common curiosities and challenges:
1. Is it really possible to grow mushrooms from used coffee grounds?
Absolutely! Coffee grounds are nutrient-dense and create a fantastic substrate for growing many types of mushrooms, especially oyster mushrooms. When properly sterilized and mixed with mushroom spawn, they provide an ideal environment for mycelium to flourish.
2. What types of mushrooms grow best in coffee grounds?
Oyster mushrooms are among the best choices for coffee grounds due to their rapid colonization and forgiving nature. However, experiment with other species like shiitake or lion’s mane, but be sure to research their specific needs.
3. Do I need special equipment to start growing mushrooms from coffee grounds?
Most of the necessary items are common household objects. A container, spray bottle, and something to sterilize your substrate (like a pressure cooker) are essential, but many DIY setups are easy to assemble with minimal investment.
4. How long does it take to harvest mushrooms?
After inoculating the coffee grounds, you can expect an incubation period of 2-4 weeks, with fruiting typically following shortly after. The overall timeline will depend on environmental factors like temperature and humidity.
5. How do I know if my substrate is contaminated?
Keep an eye out for unusual colors like pink, green, or black patches that are not typical of healthy mycelium. Mold often appears fuzzy and may have a distinct odor.
6. Can I reuse coffee grounds for multiple mushroom harvests?
Reusing coffee grounds is tricky because their nutrient content diminishes after the first harvest. However, some growers mix fresh grounds with the used substrate to extend the growing period.
7. What if I live in an apartment with limited space?
One of the best parts about mushroom growing from coffee grounds is its adaptability. Even in a small apartment, you can create a mini mushroom farm using containers or doorframe hanging bags. Urban mushroom farming is all about working smart with your available space.
8. Can mushroom coffee really boost my health?
Mushroom coffee blends, which combine traditional coffee with medicinal mushrooms, are touted for offering benefits like improved focus, reduced stress, and heightened immunity. Of course, individual results vary, so think of it as a flavorful wellness experiment.
9. How do I deal with inconsistent results or failed batches?
Growing mushrooms involves some trial and error. If a batch fails, review your sterilization, moisture, and temperature levels. Each failure is a step towards improving your technique!
10. Where can I find more detailed guides and visual tutorials?
Numerous online platforms, YouTube channels, and DIY urban farming blogs offer detailed videos and guides. Don’t hesitate to check out community forums to exchange tips and experiences.
Your Journey Into the World of Mushrooms and Coffee Grounds
Embracing the art of mushroom growing from coffee grounds isn’t just about cultivating fungi, it’s about redefining the way you interact with everyday resources. It’s a journey that transforms waste into wonder, encouraging you to rethink sustainability, creativity, and the beauty of nature’s cycles. Every step you take, from brewing your morning coffee to harvesting a batch of vibrant mushrooms, is a testament to the ingenuity that comes from combining science with a dash of rebel creativity.
As you experiment with different techniques, share your successes (and occasional failures) with others in the urban homesteading community, and discover new flavors in your mushroom coffee creations, you become part of a larger movement. One that challenges the norm, champions innovation, and showcases how nature and technology can harmoniously co-exist, even in a bustling cityscape.
Whether you’re drawn by the allure of sustainable living, the joy of DIY projects, or simply the prospect of enjoying a cup of coffee with a side of mushrooms, your journey is uniquely your own. Each harvest is a celebration of creativity, resilience, and the potential that lies in transforming everyday waste into something extraordinary.
So, embrace your inner eco-rebel, get inspired by the thriving community of fellow mushroom cultivators, and remember: every cup of coffee you brew could be the start of a mesmerizing, sustainable adventure. Here’s to fresh starts, funky fungi, and the vibrant energy of a lifestyle that’s as bold as it is green!
Looking For The Best Mushroom Coffee? You'll Love These:
Useful Interruption: Dive deeper into the world of Mushroom Coffee with our most popular sections. If there is anything you think is missing or anything you would love for us to write about, just give us a shout.
- Mushroom Coffee Equipment & Product Reviews
- Mushroom Coffee Recipes & Creative Variations
- Mushroom Coffee Guides & Troubleshooting
- Mushroom Coffee Brewing & Preparation Techniques
- Model Rocket Advanced Rocketry & Innovations
- Mushroom Coffee Fundamentals
- Model Rocket Equipment Reviews & Digital Tools
- Mushroom Coffee Health Benefits & Wellness
- Mushroom Coffee Mycology & Scientific Insights
- Mushroom Coffee Community, Lifestyle & Engagement
I tried mushroom coffee this morning and told my friend, "This brew is spore-tacular!" He shot back, "Guess that's why it's such a cap-tivating way to kickstart your day!"

