Imagine brewing your morning coffee and then using those very grounds to help your mushroom kit thrive, talk about a win-win for your caffeine habit and your fungi friends! Welcome to the ultimate guide on feeding your mushroom kit coffee grounds, where we dive into the unexpected marriage between mushroom cultivation and repurposed coffee waste. Whether you’re a plant parent looking for eco-friendly hacks, a coffee addict with a green thumb, or simply a curious soul ready to transform leftovers into lush mycelium magic, you’ve landed in the right spot. Get ready to blend science with sustainability, a dash of humor, and a whole lot of actionable tips crafted especially for Gen-Z and millennials.
Quick Links to Useful Sections
- The Unlikely Love Story: Coffee Grounds and Mushroom Kits
- Why Use Coffee Grounds for Your Mushroom Kit?
- Getting Started: What You Need for Your Mushroom Kit Coffee Grounds Project
- Your Mushroom Kit
- Used Coffee Grounds
- Additional Nutrients and Amendments
- Clean Tools and Containers
- A Humble Dose of Patience
- The Foolproof Method: How to Integrate Coffee Grounds into Your Mushroom Kit
- Step 1: Prepare Your Coffee Grounds
- Step 2: Sterilize if Necessary
- Step 3: Mix Coffee Grounds with the Original Substrate
- Step 4: Transfer Back to the Mushroom Kit
- Step 5: Maintain the Right Environment
- Step 6: Monitor Progress and Hydrate
- The Science Behind the Brew: Coffee Grounds as a Fungal Superfood
- Exploring the Varieties: Which Mushrooms Benefit Most?
- Oyster Mushrooms
- Shiitake Mushrooms
- Lion’s Mane
- Button and Cremini Mushrooms
- Troubleshooting and Tips: Avoiding Common Pitfalls
- 1. Contamination Concerns
- 2. Over-saturation of Moisture
- 3. Imbalanced Nutrient Ratios
- 4. Temperature Tensions
- 5. Patience is a Virtue
- Advanced Techniques: Taking Your Mushroom Kit Game to the Next Level
- Layering for Success
- Pre-conditioning Your Grounds
- Integrating Other Organic Additives
- Monitoring with Tech
- Integrating Sustainable Practices: Beyond the Mushroom Kit
- Resources and Community Support: Your Next Steps
- From Bean to Fungus: The Journey of Your Coffee-Ground-Fed Mushroom Kit
- Mastering the Art: Tips and Tricks for Long-Term Success
- Keep Detailed Journals
- Embrace Experimentation
- Network with Fellow Enthusiasts
- Stay Updated on Research
- Celebrate the Journey
- Frequently Asked Questions About Feeding Your Mushroom Kit Coffee Grounds
- Your Journey to Fungal Mastery: Embrace the Blend of Coffee and Mushrooms
The Unlikely Love Story: Coffee Grounds and Mushroom Kits
Picture this: your favorite coffee shop brew meets a mushroom kit in your living room, a true romance of waste and wonder. Coffee grounds, typically destined for the compost heap or the trash bin, are nature’s secret weapon as a nutrient-rich additive. Packed with nitrogen, organic acids, and minerals, they create an inviting environment for mushroom growth, turbocharging your kit with the ingredients it needs to flourish.
At first glance, coffee grounds might seem too “spent” to be useful, but a deeper look reveals that their residual caffeine, coupled with their organic compounds, can stimulate fungal growth and enhance the texture of your substrate. When you mix coffee grounds with your mushroom kit, you’re essentially giving your little fungus bomb a gourmet feast, one that’s as eco-friendly as it is innovative.
There’s a reason why our planet’s most popular morning ritual is now crossing paths with the world of mushrooms. The natural pairing of coffee and fungi isn’t just good for your morning buzz, it’s a sustainable, cost-effective method that transforms everyday waste into a powerful ally for growing your favorite mushrooms.
Why Use Coffee Grounds for Your Mushroom Kit?
You might be wondering, “Why on earth would I feed my mushroom kit used coffee grounds?” Well, aside from the obvious advantage of reducing waste, coffee grounds bring several benefits to mushroom cultivation:
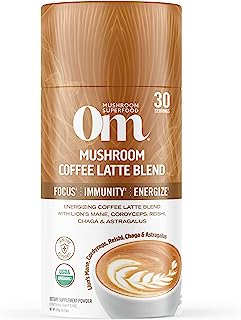
Looking For The Best Mushroom Coffee? You'll Love These:
- Nutrient Boost: Coffee grounds are rich in nitrogen and other essential minerals that fungi need for growth. This extra dose of organic matter stimulates the development of mycelium, the intricate network that forms the foundation of mushroom growth.
- pH Balancing: The slightly acidic nature of coffee grounds creates an optimal pH balance for many mushroom species, supporting a healthier environment for fungal colonization.
- Moisture Retention: Coffee grounds have excellent water retention capabilities, helping to maintain the right moisture level within your mushroom kit, an essential factor for robust mycelial development.
- Eco-Friendly Efficiency: Repurposing coffee grounds is a sustainable practice that reduces organic waste while lowering your cultivation costs. It’s a simple way to contribute to a greener planet while enjoying the benefits of homegrown mushrooms.
Integrating coffee grounds into your mushroom kit isn’t just about being resourceful, it’s about harnessing the natural synergy between waste and growth. By choosing to feed your mushroom kit coffee grounds, you're aligning yourself with environmental sustainability and unlocking a secret weapon in the world of mycology.
Getting Started: What You Need for Your Mushroom Kit Coffee Grounds Project
Before you dive headfirst into this eco-adventure, let’s lay out all the essentials you’ll need. This section will walk you through the must-have tools and ingredients for your mushroom kit coffee grounds project, ensuring you’re fully prepped for a successful cultivation journey.
Your Mushroom Kit
Of course, the star of the show is your mushroom kit, a pre-assembled, user-friendly package that contains everything you need for cultivating gourmet mushrooms. Whether your kit is designed for oyster, shiitake, or lion’s mane mushrooms, it’s built to take advantage of nutrient-rich additives like coffee grounds.
Used Coffee Grounds
Gather coffee grounds from your favorite brew, freshly brewed, of course! Make sure they are cool and free from mold (unless you intentionally want them to start fermenting, which is a whole other experimental adventure). Tip: save your grounds in a breathable container or paper bag to avoid unwanted moisture build-up.
Additional Nutrients and Amendments
While coffee grounds bring a plethora of nutrients to the table, they work best when combined with a balanced substrate. Consider mixing in other organic materials like straw, sawdust, or coco coir. These amendments enhance the texture, aeration, and overall nutrient profile of your substrate.
Clean Tools and Containers
Hygiene is key in mushroom cultivation. Ensure all your tools, containers, and work surfaces are properly sanitized. This minimizes the risk of contamination and gives your mushroom kit the best possible start.
A Humble Dose of Patience
Growing mushrooms is as much an art as it is a science. While the process can be immensely rewarding, it requires a steady hand, regular monitoring, and yes, a good bit of patience. Trust in the process, and enjoy every quirky stage of your mushroom’s journey from spore to cap.
The Foolproof Method: How to Integrate Coffee Grounds into Your Mushroom Kit
Ready to get your hands (and coffee grounds) dirty? Follow these step-by-step instructions to seamlessly introduce coffee grounds into your mushroom kit and kickstart a thriving fungal culture.
Step 1: Prepare Your Coffee Grounds
After brewing your coffee, let the grounds cool to room temperature. Spread them out on a clean tray or newspaper to ensure they dry slightly, preventing any unwanted bacterial growth. This pre-drying step is crucial for maintaining a healthy substrate.
Step 2: Sterilize if Necessary
While many experienced cultivators swear by using used coffee grounds as-is, beginners might consider a brief sterilization or pasteurization process. You can accomplish this by lightly steaming the grounds, which helps kill off any unwanted microbes without compromising the beneficial nutrients.
Step 3: Mix Coffee Grounds with the Original Substrate
Gently mix your pre-cooled coffee grounds with the base substrate provided in your mushroom kit. Aim for a ratio that boosts nutrient content without overwhelming the original formula, generally, a 10-30% addition of coffee grounds works wonders. Stir thoroughly to ensure even distribution.
Step 4: Transfer Back to the Mushroom Kit
Once your substrate is thoroughly mixed, carefully add it back into your mushroom kit. Ensure the substrate is level and evenly spread, mimicking the conditions provided by the kit’s original design.
Step 5: Maintain the Right Environment
Just like any good party, your mushroom kit needs the right atmosphere to thrive. Keep it in a warm, humid area with indirect light. A temperature range of 65-75°F and humidity levels around 80-95% will ensure your mycelium gets a head start.
Step 6: Monitor Progress and Hydrate
Over the coming days and weeks, monitor your mushroom kit closely. Mist the substrate lightly with water to ensure it doesn’t dry out, coffee grounds help, but regular hydration is still key. Document your progress with photos and notes; you’ll love tracking every stage of your fungi’s transformation.
By following these streamlined steps, you properly integrate coffee grounds into your mushroom kit, giving your mushrooms the best chance to form robust, nutrient-dense mycelium and eventually burst forth into full bloom.
The Science Behind the Brew: Coffee Grounds as a Fungal Superfood
If you’re a science nerd or just someone who loves a good backstory, let’s delve into why coffee grounds work so well for your mushroom kit. Coffee grounds are not just leftover grinds; they’re a treasure trove of essential nutrients and compounds that create the perfect microenvironment for fungal growth.
For starters, the high nitrogen content in coffee grounds accelerates the growth of mycelium. Mycelium, the vegetative part of a fungus, requires nitrogen to grow, and the organic acids in coffee grounds help lower the pH of the substrate. Many mushroom species, including oyster and shiitake, thrive in slightly acidic conditions. This pH adjustment creates a competitive edge by discouraging the growth of unwanted bacteria and mold, a natural defense mechanism embedded in your recycled coffee.
Moreover, the residual oils and caffeine in the grounds aren’t just there for flavor. They can stimulate the release of enzymes that break down complex organic matter, making nutrients more accessible to the fungi. In essence, coffee grounds act as both a food source and as a catalyst for a more efficient nutrient absorption process.
Studies have shown that substrates amended with coffee grounds often exhibit faster colonization speeds and produce higher yields, making this method irresistible for both amateur and seasoned cultivators. So, when you’re feeding your mushroom kit coffee grounds, you’re not just donating waste, you’re providing a veritable superfood for your mushroom crop.
Exploring the Varieties: Which Mushrooms Benefit Most?
Not all mushrooms are created equal, and while many species can thrive on coffee-ground-based substrates, some are particularly fond of this nutrient powerhouse. Let’s take a look at the mushroom varieties that often see the best results when fed with coffee grounds:
Oyster Mushrooms
Oyster mushrooms are the rockstars of mushroom cultivation, fast-growing, resilient, and forgiving. They’re known to respond exceptionally well to coffee ground enrichment. Their mycelium colonizes quickly, and the resulting fruiting bodies are prolific and delicious.
Shiitake Mushrooms
With a rich, umami flavor profile, shiitake mushrooms prefer a well-balanced substrate. Adding coffee grounds can enhance their flavor and accelerate the initial stages of colonization. Just be mindful not to overdo it, as shiitake mushrooms thrive in a slightly different nutrient balance compared to their oyster counterparts.
Lion’s Mane
Known for its unique, shaggy appearance and potential cognitive benefits, lion’s mane mushroom can also benefit from the organic boost provided by coffee grounds. When combined with other organic amendments, coffee grounds can help create the perfect habitat for lion’s mane to form its distinctive icicle-like spines.
Button and Cremini Mushrooms
While these common mushrooms are often cultivated using composted manure and straw-based substrates, they too can benefit from a moderate infusion of coffee grounds. The right balance will accelerate mycelium growth and contribute to firmer, more flavorful mushrooms.
Experimenting with different species and mixtures of substrates can be an exciting journey in itself. The key is to observe how your chosen mushroom varieties react to the coffee grounds and adjust your mix accordingly. Happy experimenting!
Troubleshooting and Tips: Avoiding Common Pitfalls
Even the most seasoned cultivators encounter bumps along the way. Here, we share some common pitfalls you might encounter when feeding your mushroom kit coffee grounds, and how to easily troubleshoot them.
1. Contamination Concerns
One of the biggest risks in mushroom cultivation is contamination from unwanted molds or bacteria. If your coffee grounds or overall substrate isn’t prepared in a sanitized environment, you might invite these unwelcome guests to crash your fungi party. Always ensure your coffee grounds are cooled, use sanitized tools, and monitor humidity levels closely.
2. Over-saturation of Moisture
While moisture is crucial, too much water can lead to soggy substrates and create the perfect conditions for anaerobic bacteria. If you notice a waterlogged substrate, reduce misting frequency and improve airflow by slightly lifting the kit or using a fan on a low setting.
3. Imbalanced Nutrient Ratios
Coffee grounds are fantastic, but they shouldn’t completely replace your mushroom kit’s original substrate. An overabundance can tip the nutrient balance, causing slow colonization or imbalanced growth. Stick to the recommended ratios, usually between 10-30% coffee grounds, and gradually experiment once you’re comfortable with the setup.
4. Temperature Tensions
Mushrooms love cozy environments, but extremes in temperature can stunt growth. Keep your kit in an area with consistent, moderate temperatures (around 65-75°F), and avoid direct sunlight or cold drafts.
5. Patience is a Virtue
While your coffee grounds are busy working their magic, remember that fungal growth is a process that unfolds over time. Resist the urge to overwater or disturb the substrate too early; your mushrooms need time to develop their robust mycelial networks.
Being proactive and observant will help you troubleshoot these common issues, ensuring that your mushroom kit not only survives but thrives with the rich infusion of coffee ground goodness.
Advanced Techniques: Taking Your Mushroom Kit Game to the Next Level
For those looking to push the boundaries of your mushroom cultivation, here are some advanced techniques and creative hacks to further enhance the symbiotic relationship between your mushroom kit and coffee grounds.
Layering for Success
Instead of mixing all the coffee grounds directly into your substrate, consider layering them. Start with a thin layer of substrate at the bottom of the container, sprinkle a layer of coffee grounds, and repeat the process. This layering technique not only enriches the nutrient profile but can also help distribute moisture evenly throughout the substrate.
Pre-conditioning Your Grounds
Experiment with pre-conditioning your coffee grounds by adding a splash of water, a pinch of beneficial microbes (like commercial compost starters), or even a touch of vermiculite to improve aeration. Pre-conditioning can jumpstart the decomposing process, making nutrients even more available to your mycelium.
Integrating Other Organic Additives
Why stop at coffee grounds when you can invite a whole organic ensemble? Mix in a small fraction of shredded leaves, coconut coir, or even a dash of biochar (charcoal) to further enhance the substrate's texture and nutrient availability. The trick is to experiment in small batches until you find the perfect combination that sings with your mushroom species.
Monitoring with Tech
For the tech-savvy cultivator, consider using digital hygrometers and temperature sensors to monitor the environment in real-time. Some enthusiasts even use smart home devices to set up alerts for temperature spikes or drops, ensuring that your mushroom kit remains in its happy, optimal zone.
These advanced techniques can help you fine-tune your mushroom kit's performance, turning a simple project into a science experiment that feels part art, part eco-warrior ingenuity.
Integrating Sustainable Practices: Beyond the Mushroom Kit
Feeding your mushroom kit with coffee grounds is just the beginning of a more sustainable, zero-waste lifestyle. Repurposing everyday waste like coffee grounds not only benefits your fungi but also helps reduce your overall environmental footprint. Consider these complementary eco-friendly practices:
- Community Coffee Exchanges: Many local cafes offer free coffee grounds to patrons or community gardens, don’t be shy about asking! Establishing a network for coffee ground giveaways can create a win-win situation for local businesses and urban gardeners.
- DIY Composting: Implement your own composting system at home. In addition to feeding your mushroom kits, the compost can be used to enrich your garden, reducing the need for chemical fertilizers and promoting organic growth.
- Eco-Workshops and Meetups: Join local or online communities of green-thumb enthusiasts who share sustainable practices, DIY mushroom cultivation tips, and innovative ways to manage organic waste.
- Minimal Waste Living: Embrace the minimal waste lifestyle by reusing, recycling, and repurposing wherever possible. The simple act of feeding your mushroom kit with coffee grounds is a small step toward a more sustainable future.
By incorporating these sustainable practices, your small-scale mushroom cultivation can ripple outwards, inspiring others to think creatively about waste and resource management. Every cup of coffee becomes an opportunity to nurture nature in unexpected, delightful ways.
Resources and Community Support: Your Next Steps
Diving into the world of mushroom cultivation with coffee grounds can be as overwhelming as it is exciting. Thankfully, there are plenty of resources and communities out there ready to help you level up your fungi game:
- Online Forums and Facebook Groups: Join groups dedicated to mushroom growing where enthusiasts share their tips, tricks, and troubleshooting strategies. Platforms such as Reddit’s r/mycology or dedicated Facebook groups can be treasure troves of real-world experiences.
- Local Workshops and Urban Farms: Look for local classes or workshops on mushroom cultivation. Many urban farms and community gardens offer hands-on sessions where you can learn the nuances of managing coffee grounds, substrate mixing, and environmental monitoring.
- YouTube Tutorials: Visual learners, rejoice! Countless content creators offer step-by-step guides on integrating coffee grounds into your mushroom kit, from prepping your substrate to troubleshooting common issues.
- Books and E-Books: There is a wealth of information in print and digital formats. Consider exploring titles such as "The Mushroom Cultivator" or e-books on sustainable gardening practices to deepen your understanding.
- Sustainable Living Blogs: Many eco-friendly blogs delve into innovative ways of repurposing everyday waste. These blogs often feature creative DIY projects that can inspire your mushroom-cultivating journey.
Remember, the world of mushroom cultivation is vast, and each new tip or hack can transform your coffee grounds into an even more potent force for fungal success. Don’t hesitate to engage with the community, ask questions, and share your own experiments!
From Bean to Fungus: The Journey of Your Coffee-Ground-Fed Mushroom Kit
Imagine this: every morning, as you brew your coffee, a hidden process begins, a cycle of renewal where leftover grounds transform into the foundation of a thriving mushroom crop. This journey from bean to fungus is as symbolic as it is practical; it embodies the spirit of sustainability and innovation.
Your coffee-ground-fed mushroom kit is more than just an experiment, it’s a lifestyle choice. It’s about recognizing that everyday waste holds the potential for creative reinvention. And as you watch the mycelium spread its delicate, intricate network, you’re reminded that life is all about growth, even in the most unexpected places.
This process is a celebration of resourcefulness, a modern twist on composting that marries technology, nature, and environmental consciousness. In our fast-paced, throwaway culture, reusing coffee grounds in such an inventive way highlights the potential to transform what we once considered trash into something valuable, vibrant, and full of life.
Every stage of this journey is a lesson in sustainability, a reminder that small changes can lead to big impacts. Your experiment with feeding coffee grounds to your mushroom kit might just inspire a broader movement toward mindful living and zero-waste practices.
Mastering the Art: Tips and Tricks for Long-Term Success
As you embark on your mushroom cultivation adventure, keep these long-term tips and tricks in mind to ensure sustained success and a thriving fungal kingdom:
Keep Detailed Journals
Document every step of your process. From the day you mix your substrate with coffee grounds to the first signs of mycelial growth, keeping a detailed journal will help you understand what works and what might need tweaking.
Embrace Experimentation
The world of mushroom cultivation is ripe for experimentation. Don’t be afraid to try different ratios of coffee grounds, blend in various organic additives, or even adjust your environmental settings. Each experiment is a learning experience that brings you closer to your perfect fungal formula.
Network with Fellow Enthusiasts
Much like any online community, sharing tips and experiences with fellow growers can provide invaluable insights and spark fresh ideas. Whether it’s a blog comment, a forum post, or a social media discussion, these interactions help elevate your mushroom cultivation game.
Stay Updated on Research
New studies on the benefits of coffee grounds in mushroom cultivation are emerging all the time. Keep an eye on academic journals, eco-friendly publications, or even social media channels where mycology experts share the latest findings.
Celebrate the Journey
Most of all, remember to enjoy the process. Cultivating mushrooms with repurposed coffee grounds is as much about the creative journey as it is about the end result. Celebrate each milestone, learn from the missteps, and let your success be a testament to your innovative spirit.
Frequently Asked Questions About Feeding Your Mushroom Kit Coffee Grounds
We know you might have burning questions about using coffee grounds in your mushroom kit. Here’s a roundup of the most frequently asked questions to help you troubleshoot and optimize your process.
1. Can I use coffee grounds from any coffee maker?
Absolutely! Whether you brew drip coffee, espresso, or French press, all methods yield coffee grounds that can be used in your mushroom kit. Just make sure the grounds have cooled and are free from contaminants before mixing them with your substrate.
2. How much coffee grounds should I mix into my mushroom kit?
A good rule of thumb is to incorporate between 10-30% coffee grounds into the total substrate mix. This ensures you’re enhancing nutrient content without overwhelming the delicate balance of the original substrate.
3. Do I need to sterilize the coffee grounds?
While many growers use coffee grounds as-is, beginners might find it beneficial to pasteurize them lightly by steaming. This minimizes the risk of contamination while preserving the beneficial nutrients that support fungal growth.
4. Will coffee grounds affect the taste of the mushrooms?
Not at all! The coffee grounds primarily serve as a nutrient boost for the mycelium. They do not impart any coffee flavor to the mushrooms themselves, so you can enjoy a pure, natural taste.
5. How often should I water my mushroom kit once I add coffee grounds?
Consistent moisture is key, but overwatering can cause problems. Aim for a gentle misting once or twice daily, keeping the substrate consistently moist without becoming waterlogged.
6. What if I see mold forming?
Mold can be a common concern if the moisture and temperature levels aren’t optimal. Check your kit’s environment, reduce excessive misting, and ensure proper air circulation. If the mold persists, consider adjusting the coffee ground ratio or sterilizing your substrate components.
7. How long does it take for mushrooms to fully colonize?
Depending on the mushroom species and environmental conditions, full colonization can take anywhere from a few days to several weeks. Patience is crucial, let the mycelium form a dense mat before expecting fruiting bodies.
8. Can I reuse coffee grounds for multiple mushroom harvests?
Generally, coffee grounds are best used fresh to maximize their nutrient content. However, by monitoring the your substrate’s health and supplementing with additional nutrients, you might be able to extend the productivity of your mushroom kit.
9. Is there any scientific research backing this method?
While formal academic research on coffee grounds in mushroom cultivation is still emerging, numerous anecdotal reports and smaller studies underline the benefits. The success stories from hobbyist mushroom growers consistently highlight improved growth rates and yield by incorporating coffee grounds.
10. Where can I learn more about advanced mushroom cultivation techniques?
Explore online mycology communities, enroll in local workshops, or dive into books dedicated to sustainable mushroom cultivation for deeper insights and advanced methods.
Your Journey to Fungal Mastery: Embrace the Blend of Coffee and Mushrooms
Embarking on the adventure of feeding your mushroom kit coffee grounds is more than just a quirky DIY project, it’s a step toward a sustainable future and a testament to your creative spirit. Every step you take, from gathering your coffee grounds to witnessing the intricate spread of mycelium, is an invitation to rediscover the extraordinary potential hidden in everyday items.
In a world where sustainability meets innovation, your decision to repurpose coffee grounds embodies the modern ethos of “reduce, reuse, and reinvent.” It’s about making small changes that ripple out into greater environmental impact, one mushroom at a time. Each mushroom mushroom cap that emerges is a symbol of transformation, a fusion of nature’s cycle and your personal commitment to eco-friendly living.
As you nurture your mushroom kit, remember that this journey is a continuous evolution, one that intertwines art, science, and community. With every batch, you’ll discover new insights, sharpen your techniques, and maybe even inspire others to harness the power of coffee grounds for sustainable living.
So, here’s to those who dare to see the potential in every cup of coffee, a salute to the bold, the inventive, and the eco-conscious. Your fungal masterpiece awaits, and it all starts with that simple act of feeding your mushroom kit with coffee grounds. Embrace the challenge, enjoy the process, and let your inner mycologist shine!
Looking For The Best Mushroom Coffee? You'll Love These:
Useful Interruption: Dive deeper into the world of Mushroom Coffee with our most popular sections. If there is anything you think is missing or anything you would love for us to write about, just give us a shout.
- Mushroom Coffee Equipment & Product Reviews
- Mushroom Coffee Recipes & Creative Variations
- Mushroom Coffee Guides & Troubleshooting
- Mushroom Coffee Brewing & Preparation Techniques
- Model Rocket Advanced Rocketry & Innovations
- Mushroom Coffee Fundamentals
- Model Rocket Equipment Reviews & Digital Tools
- Mushroom Coffee Health Benefits & Wellness
- Mushroom Coffee Mycology & Scientific Insights
- Mushroom Coffee Community, Lifestyle & Engagement
I tried mushroom coffee this morning and told my friend, "This brew is spore-tacular!" He shot back, "Guess that's why it's such a cap-tivating way to kickstart your day!"


